The Flawless-Skin Image Is Made, Not Found
See how lighting, framing, retouching, and presentation shape a flawless-skin image, so you can read polished beauty photos with a sharper eye.
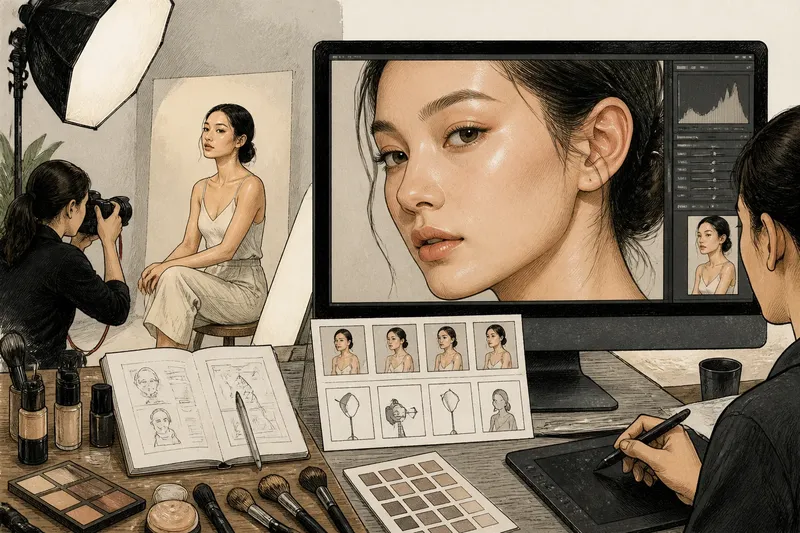
A beauty portrait appears on your screen: skin looks even, pores seem absent, and a bright highlight traces the cheek. That flawless-skin image did not simply emerge from a face. Lighting, framing, retouching, and presentation worked together to make a particular version of the skin visible.
Understanding those choices does not require dismissing every polished image as fake. It means noticing how the picture was constructed, what it emphasizes, and what it leaves outside the frame. Once you recognize the stages, a smooth complexion can read as an aesthetic result rather than a neutral record of ordinary skin.
What makes skin look flawless in a photograph?
Skin has texture, color variation, and reflective areas. A photograph translates those details into a flat image. The translation depends on the light, camera position, lens, exposure, focus, makeup, and later editing. Each choice can soften, sharpen, brighten, or reduce the visibility of particular features.
“Flawless” is also a visual judgment, not a technical description. One image may prize a matte, even surface; another may favor luminous highlights and visible freckles. Both can be carefully styled. The desired look determines which details are treated as appealing texture and which are minimized.
Think of the finished image as a sequence of decisions. Preparation affects how light meets the skin; lighting shapes its contours; framing controls what viewers see; retouching adjusts the captured image; and presentation places it in a context. These stages overlap, but separating them helps you identify what may be shaping your impression.
How does lighting change the appearance of skin?
Light is often the strongest influence on visible texture. A large, soft light source spreads illumination over the face and creates gentler transitions between highlights and shadows. This can make small surface irregularities less conspicuous. A smaller or more direct source may create sharper shadows that define texture and facial contours.
The direction of light matters as much as its softness. Light near the camera can flatten shadows and make the face appear more even. Light from the side can reveal bumps, pores, and fine lines by casting tiny shadows, while also adding dimension to the cheek and jaw. Neither setup shows the whole truth: each makes some information easier to see than other information.
Brightness and color also shape the result. A bright exposure may reduce the visibility of subtle tonal variation, while a warmer or cooler color balance changes how skin tones read. Reflectors can lift shadows; a pale background can make the face appear brighter by contrast. The overall effect comes from the arrangement, not one magic light.
What does framing leave in or out?
A close crop directs attention to a small area, such as a cheek, lip, or under-eye region. That can make a product finish legible, but it also gives one patch of skin more visual weight than it would have in a full-face view. A wider frame includes hair, clothing, background, and body language, all of which influence how polished the portrait feels.
Camera angle and distance alter proportions. A camera placed slightly above the face may change how the forehead, eyes, and jaw appear relative to one another. A lens and shooting distance can also affect perspective. A portrait photographed from farther away and cropped later may read differently from a close camera position, even when the subject and lighting are similar.
Focus is another framing choice. A sharply focused face against a soft background draws attention to the complexion, while a shallow area of focus can leave parts of the face less defined. Hair crossing the cheek, a hand near the jaw, or a deliberately turned head may conceal some skin while guiding the eye toward other features.
What can retouching change?
Editing ranges from broad adjustments to highly localized work. Global changes to brightness, contrast, color, or sharpness affect the image as a whole. Local edits can soften a patch, reduce the appearance of a blemish, even out redness, or alter the boundary between highlight and shadow. The distinction matters: a color correction is not the same visual intervention as removing skin texture.
Some edits are difficult to notice because they follow the image’s existing light and tone. Others produce clues: pores disappear in one area but remain nearby, fine hairs lose definition, or the skin’s surface looks unusually uniform compared with the eyes and lips. These clues are not conclusive on their own. Lighting, compression, focus, and makeup can create similar effects.
Retouching can also reshape how skin relates to the rest of the portrait. Brightening the under-eye area, softening a line, or changing the transition between face and neck can make the whole image feel more even. A smooth finish is therefore not always the result of a single “skin-smoothing” tool; it can emerge from many small adjustments.
How do makeup and presentation contribute?
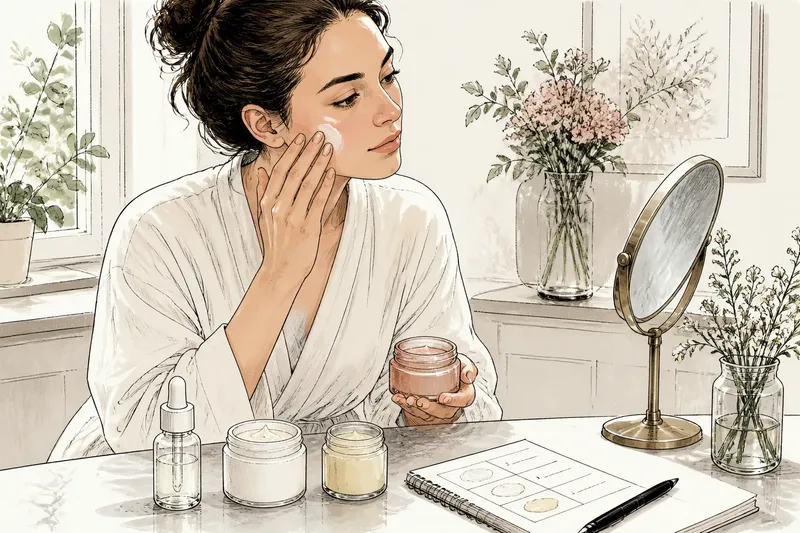
Presentation begins before the shutter clicks. Skincare, primer, foundation, powder, and highlighter affect how light reflects from the face. A matte product can reduce shine, while a reflective finish can create deliberate highlights. Color correction may reduce the appearance of redness or darkness, and careful placement can make the complexion look more uniform on camera.
Makeup choices are often adapted for the lighting and camera. A finish that looks subtle in a mirror may appear different under strong studio light or on a phone screen. Hair, wardrobe, background, and facial expression add further cues: a clean backdrop and controlled styling can make the complexion feel like the image’s central feature, while a busy setting gives viewers more competing details.
Digital presentation continues after editing. Cropping for a square post, placing text over one side, or showing a close-up in a product advertisement changes how the image is read. A small screen can hide fine texture; a larger display may reveal it. The caption and surrounding images also frame whether the portrait looks like a beauty ideal, a product demonstration, or a candid moment.
Which questions help you read a polished beauty image?
Does soft lighting remove skin texture?
Soft lighting can make texture less prominent by reducing sharp, small shadows, but it does not literally erase skin detail. Focus, exposure, makeup, and editing also affect what remains visible.
Can I tell whether a portrait was retouched?
You can look for uneven detail, blurred patches, or inconsistencies in texture, but no single clue proves that editing occurred. Image compression and lighting can create similar appearances, so treat visual clues as possibilities rather than a verdict.
Why does skin look different in a mirror and a photo?
A mirror gives you a moving view under the room’s changing light, while a photograph freezes one angle and one moment. Camera processing, display brightness, makeup, and distance can all change the apparent color and texture.
Does a close-up show what a product will look like on me?
A close-up shows a particular face under a particular setup, not a promise of an identical result on another person. Skin tone, texture, application, light, and camera processing all shape the appearance.
How can you compare images without overreading them?
Start by asking what the image is trying to communicate. A campaign portrait may emphasize a finish or mood; a product close-up may prioritize coverage; a creator’s casual photo may still involve chosen light and framing. The purpose does not make the image worthless, but it helps explain its visual choices.
Then compare like with like. Look at several images of the same person or product, noting whether the light, angle, crop, and background change. If one image is dramatically smoother, ask which production choices could account for it before assuming the person’s skin changed. Avoid treating one portrait as a baseline for how anyone should look.
Say you see a foundation image with a very even cheek and a bright highlight. Imagine the same portrait photographed with a large soft light near the camera, a light reflector under the face, and a tight crop that excludes the room. Those choices could make texture less noticeable before any editing; later color adjustments might further unify the complexion. The observable result would be a more polished-looking image, not evidence that the face had no texture.
It is not worth trying to reverse-engineer every pore or deciding that every smooth image has been heavily retouched. You rarely have enough information to separate lighting, makeup, camera processing, and editing with certainty. A more useful habit is to recognize that several ordinary presentation choices can combine to create a striking effect.
What does this change about the way you see beauty images?
When a flawless-skin image appears, read it as a designed presentation. Ask where the light falls, how tightly the face is framed, which details remain sharp, and whether the image is selling a look or showing an everyday complexion. That simple pause keeps a polished photograph from becoming an unfair standard for your own skin.
The phrase “flawless-skin image” describes an outcome shaped by choices, not a condition viewers need to search for in themselves. Seeing those choices clearly lets you appreciate craft, question context, and separate a camera-ready finish from the varied skin you encounter off-screen.